Canon Photo Paper Pro Platinum Review
Canon’s Pro Platinum paper is a gallery quality high gloss paper that delivers solid image quality for a wide verity of prints. However, as a gloss paper it does come with limitations that may not be ideal in every situation.
For the longest time Canon’s Pro Platinum paper was my paper of choice for printing images. At the time when I was first starting out, it was hard for me to step away from the performance metrics and understand that prints are about more than just the specifications and measured results for the papers; they’re a much more tangible product.
This isn’t to say that Canon’s Pro Platinum paper isn’t a really nice paper, it is.
However, the subject of choosing a paper is also far more complicated than it might seem at first glance too. On one hand, you have personal preference and how you think a photograph should look. On the other hand, you also the need to match the paper to the situation.
Sorting out Canon Papers
If you’ve read any of my other Canon paper reviews, you can probably skip this section.
If you’re new to Canon’s paper line, you might be slightly confused by what’s going on. They have multiple versions of seemingly similar papers (such as pro luster and plus semi-gloss), and this certainly can be confusing.
To try and organize things, I’ve found that the following table does the best job in trying to organize their papers.
| Photos at Home | Gallery Quality | |
|---|---|---|
| High Gloss | Photo Paper Plus II Glossy (PP–201) |
Photo Paper Pro Platinum (PT–101) |
| Gloss | Photo Paper Glossy (GP–601/GP–501) |
|
| Semi-Gloss | Photo Paper Plus Semi-Gloss (SG–201) |
Photo Paper Pro Luster (LU–101) |
| Matte | Matte Photo Paper (MP–101) |
Pro Premium Matte (PM–101), Museum Etching (FA-ME1)[1] |
Surface, Feel, and Weight
Canon’s Pro Platinum is a smooth high gloss paper. When it comes to prints, gloss papers have some advantages and disadvantages.
On the positive side, because the surface is supremely smooth, and requires a very smooth coating to reach the gloss levels, the paper is capable of holding very fine details, capturing deep blacks, and rendering bright saturated colors compared to semi-gloss and especially matte papers.
On the other hand, a gloss surface comes with some marked disadvantages. To start with the glossy surface is reflective. For small prints, like 4x5s, the reflectivity isn’t a significant problem as the viewer can adjust the print to not have reflections of lights in it. On the other hand, for larger prints (13×19 and up), the gloss surface becomes much harder to shield from undesirable reflections.
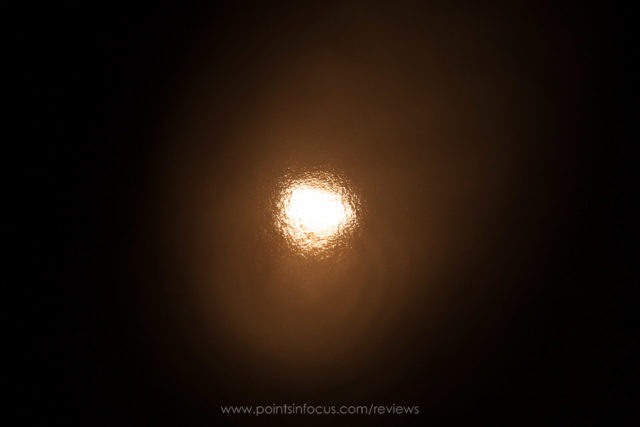
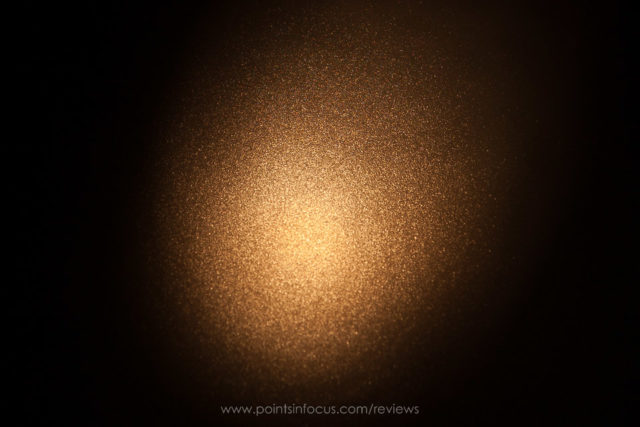
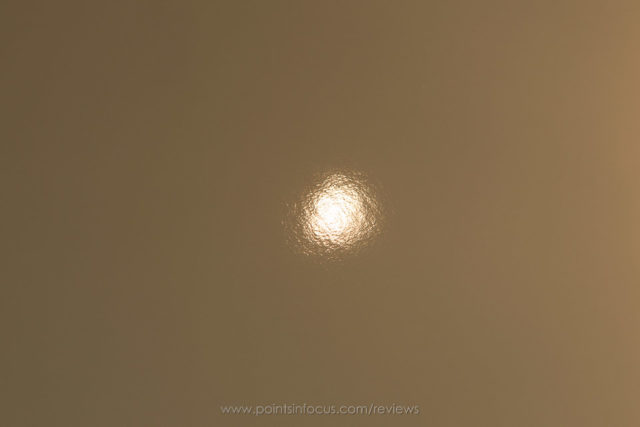
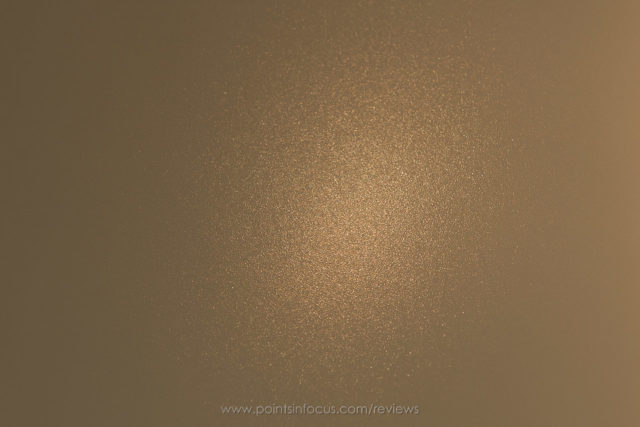
The above two sample sets show the differences in direct and indirect reflections with the various paper surfaces. As you can see, the gloss paper produces a very bright concentrated specular highlight where the light hits it, even when the viewed from off axis to the light.
Additionally, gloss papers aren’t great to handle. To start with, the surface can potentially collect finger prints — though the archival print purists would argue that you shouldn’t ever handle prints with your bare hands anyway. More importantly, to me at least, high gloss prints don’t carry the same kind of fine art field that matte prints do. For framed prints, this doesn’t really matter. However, if your intent is to have a more intimate viewing experience, then this becomes a much more important characteristic.
In my experience, the way you lean on the gloss to matte spectrum has a lot to do with personal preferences and ultimately how an image is going to be displayed. When you want the best detail and color performance, and are going to matte and frame the image and control the lighting on it, then a gloss paper like the Pro Platinum is a good solution.
However, if you want to handle your prints, or maybe display them without being matted and framed, then a more matte option is usually better. Of course, you can also split the difference and use a semi-gloss paper like Canon’s Pro Luster too.
When I started printing, as I noted earlier, Pro Platinum was my go to paper. In my mind at the time, the most important things was to get the most color, saturation, dynamic range, and detail in my prints. Over time, I’ve come to realize that the overall feel of the print is far more important than minute differences in detail. Consequently, I find I print far more on Canon’s Pro Premium Matte now than I do on their Pro Platinum.
Brightness and Whiteness
A paper’s brightness quantifies the reflectivity of the surface. It’s specified on a scale of 0 to 100, with 100 indicating that the paper reflects all of incident light.
That said, you’ll occasionally see papers with higher than 100 brightness ratings, this is a clear indication that the paper uses optical brightening agents (OBAs). OBAs increase the brightness of the paper by absorbing invisible UV light and emitting it as visible blue light, thus making the paper appear brighter.
OBAs aren’t inherently bad, though you could make the argument that they’re not an ideal thing to have in a photographic print. To start with, UV light tends to break down the pigments in the inks we print with, causing colors to fade. In fine art applications, prints are almost always displayed behind UV blocking glass or are finished with a UV blocking varnish. In either of these cases, the OBAs won’t work (or work as well), and the brightness of the paper will decrease.
Additionally, if you create your own printer color profiles, you will need a spectrometer that uses a UV capable light source. For example, this means that to properly profile a paper that has OBAs, you’d need the $1600 i1 Basic Pro 2(Affiliate Link) instead of the $500 Colormunki Photo(Affiliate Link) .
Canon advertises their Pro Platinum paper as having an ISO brightness of 98. While this is lower than 100, this doesn’t necessarily mean that the paper is OBA free. Moreover, they don’t advertise whether OBAs are used or not.
However, we can generally test for the presence of OBAs using a UV light. If the paper fluoresces strongly under UV light, then the paper almost certainly uses OBAs.
In my OBA test I try to put the paper against samples of something with a similar surface finish and with known OBA use to make the judgement more clear. Unfortunately, I don’t have another gloss paper stock that I know has OBAs to put along side the Pro Platinum, so for this test, I’ve put it next to a sheet of Moab Entrada Rag Natural (no OBAs) and bright (OBAs).

Based on the results here, I’m confident that Canon’s Pro Platinum paper has OBAs in it. It definitely fluoresces under the UV light — though it’s brightness in the above image is partly due to the gloss finish instead of the matte of the two Entrada papers.
Color Gamut and Range
One of the strong suits for gloss papers is their ability to produce bright saturated colors, so it’s worth at least briefly talking about that.
I don’t currently have a spectrometer — or a whole slew of high end printers for that matter — so this isn’t as complete or exhaustive of a test as it could be. However, it is at least reasonably indicative of the performance you can expect form these papers.
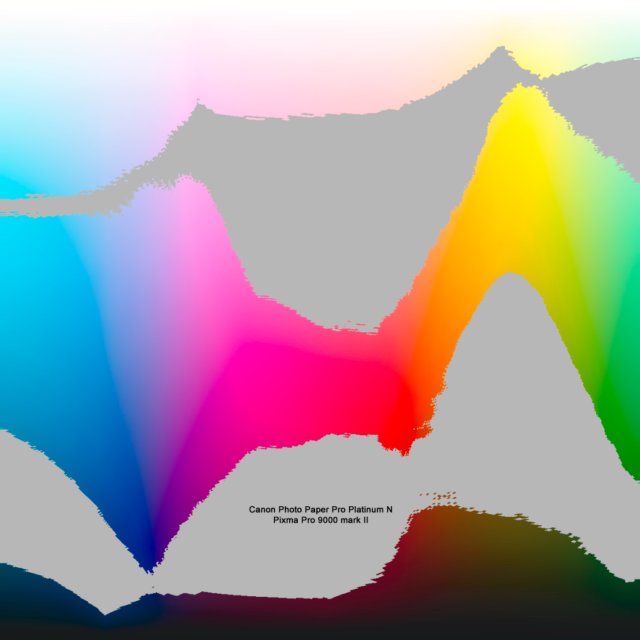
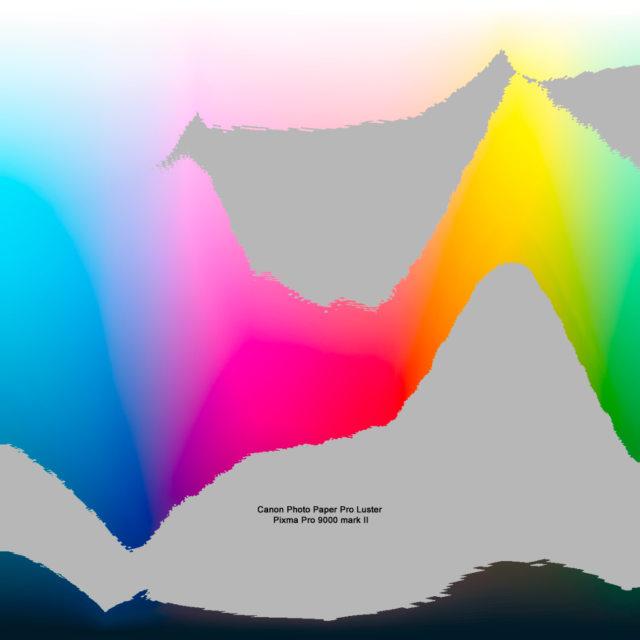
The proceeding images are one way to visualize the color gamut of a paper. I’ve used Canon’s ICC profiles for various papers for their Pixma Pro 9000 Mark II[^printer] to generate gamut warnings over a granger rainbow in Photoshop. The gray areas indicate colors that the printer can’t produce.
Drying
All inkjet prints require some time after they’re printed to fully dry.
Coated papers, such as Canon’s Pro Platinum, are designed to wick the ink into their surface using capillary action as soon as the ink is deposited on the paper. However, for the print to become “permanent”, the solvent carriers in the ink need to fully evaporate leaving just the coloring in the paper.
Canon’s instructions for the Pro Platinum paper have this to say about drying:
Drying Sheets After Printing
Placing printed sheets in plastic folders, albums, etc. immediately after printing or before they are sufficiently dry may result in bleeding or discoloration of the printed images. To prevent such bleeding/discoloration from occurring, follow the instructions before storing printed sheet.
- After printing, allow the sheets to dray from about 24 hours.
Make sure the printed surfaces don’t do not overlap. Allow the sheets to dry for about 15 minutes first, before stacking the sheets. Stack the sheets by placing plain paper (such as copier paper etc.) in between each sheet then allow to dry for 24 hours.Note : Do not use heat from a hair dryer or direct sunlight
While I’ve never personally run into problems with improperly dried prints, I’ve never immediately placed prints in plastic binders or other close contacting containers either and have always followed a procedure that’s similar to Canon’s recommendations anyway.
Choosing the Right Canon Paper
When it comes to choosing the right paper, the answer is part personal preference, partly dependent on the image in question, and partly dependent on how the image will be displayed.
Canon Photo Paper Pro Premium Matte is, in my opinion, best used for prints that you want people to handle and experience in the hand. This could be as loose sheets, or in some kind of bound album. Either way, I think the paper really shines the most when you can touch it. In addition to that, prints that will be displayed without covering can benefit from the matte surface as they won’t reflect light.
Canon Photo Paper Pro Luster provides an increased color gamut, better black detail, and higher resolutions than the Pro Premium Matte, and does so without all of the glare issues imposed by the gloss Platinum paper. This paper is good for situations where you want to resolve more color and detail while still not having a high gloss sheen, though the texture can sometimes be distracting compared to the high gloss Pro Platinum. In many ways, this is a good general use paper; at least if you’re not smitten by the feel of Premium Matte.
Canon Photo Paper Pro Platinum is Canon’s ultimate solution for high resolution gloss printing. Though the cost of that is the high gloss surface and the reflections it can bring. When you need every detail and every possible color, this is likely what you want. In fact, until I started using Premium Matte, Pro Platinum had been my go to paper since I started printing, and still is what I’m going to reach for when I need the most resolution and color for a matted and framed print.
Conclusions
Printing, and the paper you print on, is a deeply personal thing. Unlike say viewing an image on a computer screen, there’s an integral interplay between the paper and the image that goes beyond just creating a photograph. The choice of paper absolutely has a massive impact on the end result of the printed image. Choose the wrong paper, and even a fantastically composed image can feel stilted and cheap.
Beyond that there’s always the matter of personal preference. Even when the choice has been narrowed down to glossy or matte, there are myriads of options in that range that have different qualities.
All told, there’s not a lot to complain about with Canon’s Pro Platinum paper, at least not on the technical notes. However, that means so much less when it comes to paper than it may seem at the outset.
Ultimately, while I’ve switched to Canon’s Pro Premium Matte paper due to feel and the way I interact with my prints, I keep a small stock of Pro Platinum paper in my printer supply stash for when it really is the best choice for an image. There are still times when the gloss paper is a better choice than a matte one, and Canon’s Pro Platinum is an easy and straight forward way to get that with a Canon printer.
-
*The Museum Etching is actually manufactured for Canon by Hahnemühle, and is a cotton rag based paper with a matte but textured surface. ↩︎




Comments
It looks like Pro Platinum paper is gone. I bought 100 sheets of 13×19 when Canon was closing it out at half price to supplement the 50+ sheets I already had on hand. I just wish I had bought more, but it’s out of stock now. Now I’m sometimes buying more 10 sheet packs when I see it for a good price. I’m starting to sell prints again, so I’ll be using the proceeds to fund more purchases of Pro Platinum.
I’ve printed several images from scans of negatives on Pro Platinum and compared them to silver prints I made in the darkroom back in the dark ages and I think the Pro Platinum prints are every bit as good or better than my silver prints and I was a damn good printer back in the dark ages.
I’ve come across some listings for Canon Photo Paper Pro II and I thought it might be the replacement for Pro Platinum found out Pro II was introduced in 2008, so it looks like Pro Platinum replaced Pro II.
I guess I’ll buy a couple of sample packs of Pro Premium to see what I think of it.
Hi Bill,
I’m not sure where you are, but I’m not having any trouble finding Pro Platinum in sock. B&H, Canon’s Store, and Amazon all have it in stock right now for $17 a pack (half off give or take).
One of these days, I’m going to have to try out the Pro Premium Smooth, but that’s probably going to have to wait until I upgrade my printer.
Thanks for commenting.
Hey Jason,
Just stumbled upon your site. This is a great review and a very informative article too.
I use Kodak photo papers, basically because they are cheaper than Canon’s papers and they are pretty solid too.
So I create my own profiles (with ColorMunki Photo) and I was looking for a way to measure the gamut of the paper settings in my Canon printer. Your gamut warning method really helped me to easily define the widest gamut paper setting for the photo that I was creating the profile for. So thank you very much.
Cheers,
Hi Erkan,
Another thing you can do to visualize the color gamut is use the 3D Gamut viewer that’s included in DisplayCal. It takes the ICC profile you create with your ColorMunki (or you can use it to generate profiles) and plots as both 2D graphs, and as 3D models. It’s not that hard to get setup, and I have a guide for installing it and using it for monitor profiling.
Hey Jason,
I’m using DisplayCal but I’ve never successfully visualized the ICC profile previously, at least I didn’t understand anything from what I saw, let me try it further again… Thanks for your reply.
Cheers,
The feature you’re looking for is “Profile Information” under the File menu. Open the ICC profile, and the graphs are on the left side. You can compare to other profiles and so forth in the options there.
Sadly it doesn’t support ICC v4 profiles that I’ve created with the X-Rite software. By the way did you try using Arglly for printer profiling before?
Oh yea, I forgot about that limitations.
Sadly no, I don’t have a spectrometer yet, so I can’t do printer profiling at all. One of these days I’ll get around to doing something about that. However, Canon’s profiles seem to do really good with their printers and papers, at least I get prints that look like I intended them too. Though, I don’t do advertising work where I need color to be absolutely spot on or the client gets mad; it just has to look right to me.
Yeah, but I don’t use the expensive Canon ink, just found a knock-off Chinese ink (called PhotoInk) that is very common here in Turkey and I pretty much like it because if you profile it you can get decent results. It is so cheap that basically it removes the ink cost from the equation (500 ml x 5 bottle ink is around 30 USD).
I had real bad experiences with 3rd party ink in the past, like destroying printers bad, so I stay away from the stuff. I’m sure it’s better now than it was when I tried it, but I’m not at all keen on repeating that experience.
You’re right, But when you consider all the ink that I spent, it would probably cost me a couple of printers worth of money. So I guess this is the risk that I’ll take for now at least until I manage to get the quality 3rd party ink like one of these: https://precisioncolors.com/
I’m pretty sure I’ve already spent more than a couple of printers worth of money on ink… :(
When I get around to upgrading my printer one of these days, I may keep my current one (if it still works) and try some 3rd party inks in it.
That’s a good idea :)