Custom White Balances: Why Not to Use Printer Paper
Creative uses aside, accurate white balance is critical to insuring the proper reproduction of colors in a photograph. In cases with difficult lighting conditions frequently we create and turn to custom white balances to insure the color in their images is correct.
However using the common copy or printer paper, which usually contains optical brighteners-chemicals that change the color response of the paper-can lead to bizarre and incorrect results under some conditions but not others.
Background
The white balance controls how colors are reproduced in an image by changing the way the 3 additive colors (red, green and blue) are mixed. Any photographer who’s taken a picture in a room lit by incandescent lights with daylight film or even with most digital cameras and had everything look very orange should have realized that different light sources have different colors. For example, incandescent lights produce a very warm orange light with a lot of amber or orange color and most florescent lamps produce light with a green cast.
Our brains adjust for this based on experience and intuition (we know something white should be white and perceive it that way). However a camera doesn’t have that luxury, it needs to be told how the light illuminating a scene changes the color of things in the scene. In many cases, the camera is intelligent enough to figure this out on it’s own. This is the Auto White Balance mode.
However in very complex lighting situations where lights with several different color balances are mixed or when more accuracy is necessary. Most digital cameras allow you to create a custom white balance by photographing a target in the light you intend to work in order to work around these problems.
The requirements are simple, you need a way to show the camera a neutral gray target illuminated by the light that you want to balance for. Serious photographers will use a photographic gray card, a color check card or one of the myriad of white balance targets to insure accuracy.
Fortunately, or unfortunately, the target doesn’t specifically need to be mid-tone gray either, and many amateur photographers exploit this by substituting a sheet of white typing paper as their target.
This however is problematic.
Typing/printer paper isn’t designed with photography in mind. In fact it’s primary objective, besides holding the ink or toner that’s printed on it, is to make the print look good. One thing that definitely doesn’t make the print look good is not so white paper. One of the ways that paper manufacturers make paper whiter is to add optical brightening agents (OBAs) to the paper when it’s produced. OBAs are fancy dyes that absorb UV light and emit visible blue light. The result is that the paper appears bluer, which for some odd reason makes it also appear whiter and brighter.
The OBAs are the problem that makes using regular paper unsuitable for creating custom white balances. The paper is not necessarily neutral under all kinds of lighting.
The White Balance Test Setup
The plan was to use some different papers and generate white balances under both indoor flash conditions and outdoor sunlight conditions.
The papers used were:
- Office Depot multipurpose bright white paper – 20 pound 108 brightness (US) paper
- Kodak Bright White inkjet paper – 24 pound 108+ brightness (US) paper
- Hammermill Color Laser Gloss paper – 32 pound 90 brightness (us) paper
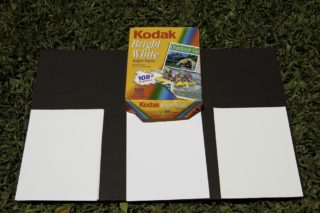
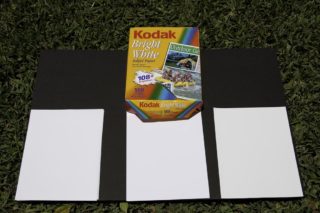
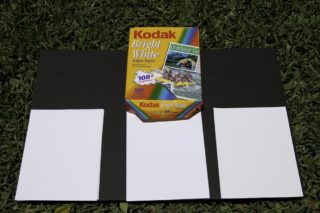
The three papers were laid out on a solid color background (in this case I used a sheet of black foam core) indoors under direct flash illumination and outdoors under sunlight.
I choose direct flash for 2 reasons:
- Canon’s flashes communicate the proper color balance to the camera so I’d have a point of reference.
- Second, direct flash eliminates any color cast from a bounce surface or photographic umbrella.
An exposure was made indoors with flash and again outdoors under the sun, with the camera set to auto white balance. Remember, Canon’s flashes tell the camera what the color temperature of the light they emitted is.
Both exposures were checked to insure that the papers were not clipping.
The image was then duplicated in Adobe Photoshop Lightroom 2.4 and a custom color balance was set using each of the white papers.
All images were rendered using the default Lightroom settings and the Adobe Standard camera profile.
Indoor Flash Results
Note: The images used in this article are rendered in the ProPhoto RGB color space. If your not using a browser that supports color management they will render incorrectly, however the differences in color should still be visible on most displays.
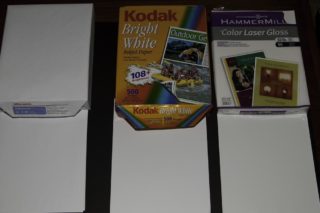
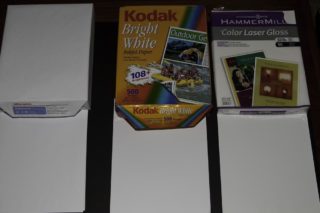
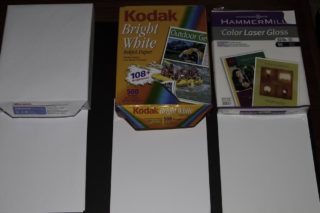
The table below shows each of the corrected white balances from the indoor photographs. The camera reported white balance was 6200K +6 magenta.
As you can see, indoors there is still some difference in the white balance but the papers all fall within 100K of the white balance the flash reported.
As far as I’m concerned the variations aren’t significant and could be due to any number of factors including any other dyes that the paper contained. Clearly under flash lighting there is not enough UV light to active the OBAs and affect the paper’s color and almost any of the color balances would be acceptable.
Outdoor Sun Results
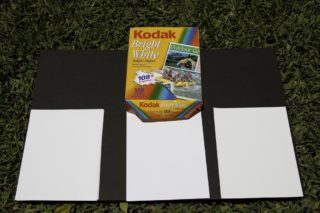
The next table shows the color balances using the same 3 sheets of paper taken outside at approximately 1 PM EDT under clear sunny Florida skies.
The camera calculated the white balance at 5550K -7 green, and balancing using the black foam core board gave me a value of 5350K -2 green.
To my eye the two images balanced on the 108+ brightness paper have a yellow/amber cast. This is consistent with OBA’s causing the paper become bluer under UV light.
Further to my eye the AWB result looks fairly consistent with the way my eye perceived the color of the grass. Unfortunately, I didn’t have a gray card handy to get an accurate measurement.
Conclusions
The results are pretty clear to me, even though this wasn’t very scientific.
Most common office papers, especially bright white ones, have some level of OBAs in them. This makes them unsuitable as white balance targets under any condition where they may be exposed to UV light. Basically anything outdoors. The indoor tests showed that they could be used in a pinch if necessary as long as your lighting doesn’t emit a lot of UV (some halogen lamps are strong sources of UV light).
Outdoors, common office papers should be avoided completely.
The best solution of course, is to use a photographic gray card(Affiliate Link) , the are inexpensive and guaranteed to be both neutral and not shift in color in any meaningful way. An even better solution is to use a chunk opaque white PTFE plastic (such as this 1/8″ PTFE sheet(Affiliate Link) ), or even Teflon pipe tape(Affiliate Link) , as it reflect very uniformly across all of the optical spectrum providing both a very neutral and very white white target[1]
-
See the white balance spectral results in this article at photographylife.com ↩︎
Comments
There are no comments on this article yet. Why don't you start the discussion?