Among the ton of new features, the big one, for me at least, is Process 2012, in the develop module. However, with new toys come new teething problems, and I’ve found no shortage of them in the new process version.
First the good, the new process version, even when using a medium contrast tone curve, produces more detailed shadow areas, or at least lighter ones. Trimming the black point and curve has become something of a ongoing process for me, and I hope to have reasonable defaults sooner rather than later, because doing it on a per image basis is kind of annoying.
The flip side however, is that unlike process 2010, which was largely a straight upgrade from LR2’s process 2003, process 2012 is a completely new cup of tea, and it really shows when working on an image that got updated to the new process version. Moreover, there are still, distinct reasons to use the 2010 process version for producing gritty/edgy images.One of the big reasons for this is the adjustment made to the clarity tool, which no longer blooms quite as much as the one in LR 3 did.
Unfortunately, I think that Adobe decided to express the process version somewhat poorly. Like in LR3, you can change it though the Camera Calibration pallet. However, unlike the 2003->2010 which basically granted better noise reduction controls and improved the rendering of details, process 2012 really affects the rendering of the image in terms of colors and luminance. I think in many ways, it would be more appropriate to have a button in the Basic pallet to toggle/switch between process versions, or at least between 2010 and 2012.
For that matter, I’m not sure an ! in a box is a good indicator that the process version is not set to 2012.
That said, it’s not all bad. In fact, it’s really good. The new process version and the improved basic exposure controls it brings to the table are simply really good—once you get the hang on them. There are a number of cases, where I can get what I want out of an image faster using the new controls than I could using the old 2010/LR3 controls. I think, the only real downside, is that the old controls have been largely the same since 2003, and now we’ve got to retrain ourselves on the new controls. Teaching an old dog new tricks, and all of that.
My one word of advice, if you’re use to Lightroom 1-3’s controls, be patient, it’s gonna take a little time to get back up to speed in the new process version.

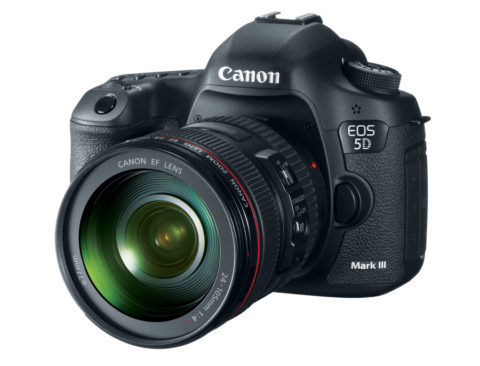
In what appears to be a really striking move Canon has finally done what Nikon did 4 years ago when the released the D700; namely release a seriously solid entry-level full frame camera that doesn’t take prisoners. In fact, the 5D mark 3 addresses many of my complaints with the 5D mark 2, and Canon’s mid-level cameras in general, and makes some serious strides in providing a solid full frame camera on an only somewhat bank breaking budget.
The Sensor
Unlike the D800’s 36 mega-pixel sensor, the 5D mark 3 only makes a tiny step forward, going from 21.1 MP to 22.3MP. Though the step is small, this is coming on the heels of at least a generation of improvements in sensor tech. In short, the nearly identically sized pixels in the 5D mark 3 should produce considerably better images than the 5D mark 2; and stand a good chance, noise wise at least, to blow the D800 out of the water.
Those improvements in technology are also seen in the expansion of the camera’s working ISO range to ISO 100-25600 base, with expanded modes of 50, 51,200, and 102,400. In fact, Canon is claiming a 2 stop improvement in noise performance over the 5D mark 2, and that the 5D mark 3 will be only 1 stop behind the EOS-1D X. In practice, that 1 stop difference coupled with the 4 MP higher resolution sensor on the 5D mark 3 should make things very much a dead heat.
Read the rest of the story »
So this is a little different than my usual M.O., I have a question for my fellow photographers, not a guide or tip or review. So here it goes.
To put it simply, I’m running out of storage space. The 2011 Thailand flooding, and the global hard drive shortage that followed has priced storage in such a way that I’m doing everything I possibly can to extend what I have now another 6-9 months in hopes that the prices will come back down. My normal procedure for this is to go back and aggressively edit my collection of images, deleting all the “maybes” that I probably should have deleted in the first place, but kept because, “hey! storage is cheap!” In the process of doing this,
I’ve run into quite a number of rather massive panoramas that I’ve put together in increasing numbers. Each pano for me consists of a 100MB to 1GBish 16-bit PSD file plus all the source RAW files (often totaling to another 100MB or so).
On one hand, I’m somewhat adverse to the idea of tossing the RAW files. The are after all the most compact way of storing the data, and rebuilding the pano is often just a matter of compute time in Photoshop. I could even go so far as to dump the 16-bit PSD and convert the final images into an 8-bit JPEG, since, after all, if I need to make any real serious adjustments, I can always just rebuild the pano from the RAWs.
On the other hand, with the 16-bit stitched PSD or TIFF now being basically the RAW, the component RAW files seem to be of little use and serve little purpose. Granted while this doesn’t save nearly as much space as down converting the PSD, it can all told save several GB total across the board.
Which in a rather long winded way brings me to the meet of this post, the question. How do you, my fellow photographers, deal with your stitched panos and the RAW files that make them up?
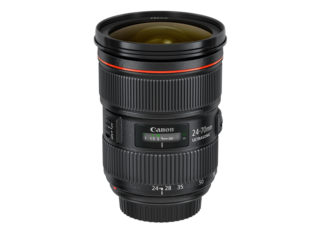
Canon has announced 3 new lenses; a revised EF 24-70mm f/2.8L USM II, along with two primes an EF 24mm f/2.8 IS USM, and an EF 28mm f/2.8 IS USM. And while their press release promises impressive new heights in optical performance, I personally can’t find myself getting past the price tags.
While it’s been clear for the past couple of years, the prices of camera gear coming out of Japan has been going up—in part due to a stronger Yen and a weaker dollar—the prices have been increasingly heading towards the point where I have to question whether the gear is worth that kind of money any more.
Canon EF 24-70mm f/2.8L USM II
The 24-70mm focal range has long been the workhorse for photographers. In fact, even though it’s not my favorite lens, it’s almost certainly my most used lens. And it’s hard to argue that while it works, and does a good enough job, the current Canon EF 24-70mm f/2.8L USM was somewhat lagging behind Nikon’s in terms of optical quality. So the announcement of the EF 24-70mm f/2.8L USM II isn’t entirely unexpected.
Read the rest of the story »
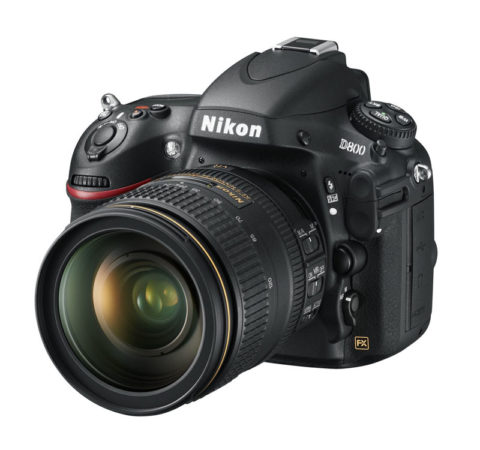
Well they’ve gone and done it again, Nikon’s pushed out another damn impressive still camera for those on a budget. It’s too bad, in my opinion, that Canon won’t take a page out of their playbook and do something similar.
So the brass tacks are as follows
- 36.3 MP effective FX sensor
- Base ISO range of 100-6400, expands to 50-25,600
- 4 FPS without the standard EN-EL15 battery, 6 FPS with the EN-EL18 (D4’s) battery in the MB-D12 grip
- Pentaprism viewfinder with 100% frame coverage at .7x
- 51-point D4 AF system
- Dual Card slots: 1- Compact Flash & 1- SD

Sensor and Frame Rate
The thing I think that impresses me the most is the frame rate at the sensor resolution they’re getting.When it comes to frame rate there are things that can become limiting factors, one is the time it takes for the mirror to cycle back down and the AF and metering systems to collect the data they need, the second is the amount of data that has to be read from the sensor and processed. This has been part of the force behind the megapixel limitations seen in the sports cameras, over their similar but higher resolution “studio” counterparts.
Read the rest of the story »
Forgive me for a moment, I’m going to ramble for a moment about a realization I just had that may be worth thinking about. So here I go…
I’ve long approached my photography in terms of designing an image, perhaps sometimes to the detriment of actually pressing the button and getting an image. Regardless though, what this really means is that I spend a lot of time looking at images, both mine and those taken by other photographers, and trying to figure out what not only makes them tick, but sometimes the thinking that went into getting there. A friend of mine once called this theoretical photography; maybe I shouldn’t, but I like the description.
Which brings me to the theoretical photography moment I want to talk about; how the intended, or at least most common end result can subtly influence the way you actually compose your images—or at least how it affects me.
The impetus of this was this was watching the IMAX movie Blue Planet on the tiny display of my iPad. Having been originally intended to fill a 60 by 80 foot canvas, the composition of the shots was inherently loose. What I mean is, for example, a lioness and her cubs would be bigger than life sized even if they were only say maybe a 1/4 of the frame tall. However, on a tiny display, what amounts to a tiny print, the lioness is little more than an tiny smudge—okay it’s not really that bad.
But that got me thinking about my own work. Most of which is destined, due to printer and camera resolution constraints to be small images, either as a print smaller than say 20×30 or as an image on the web or a computer display. As a result of this, and my increasingly dated 10 MP gear, I find that I heavily bias my own compositions and subject matter in at least two ways.
First, I dramatically favor tight compositions. Not only do they tend to clean up backgrounds, which I think in some ways is a crutch, but they put the most pixels on the subject as possible. Moreover, I’ll take this to the point of doing panos/stitches of things that probably don’t really need to be 100+ MP images, just because to get what I consider acceptable detail and wide angle images.
The second aspect of this is that I tend to also look for and favor images that are more color and geometrical in nature, as opposed to things that rely on being able to resolve detail. So things like twilight light, or the way the atmosphere will affect the color and density of successive tree or ridge lines.
Of course, I would also argue that identifying when you subconsciously do things is the first and most necessary step to addressing those things. Which is really why I’m writing this, no so much to opine on my own flaws, but to perhaps draw light to the need to step back and look at how you may be unexpectedly biasing your own work. I know I probably would have never paid any attention to it, had I not had the right combination of content targeted at immersion and a tiny rendition to notice that even though I try to insure that my gear isn’t dictating my vision, more often than not it really is.
Which brings me to the realization I had the other day. The resolution and format you shoot in and the presentation you’ll be making have and incredibly profound influence on how you compose images to start with.
Today across the internet many major websites, including Reddit, Wordpress, and Wikipedia are going dark in protest over some insidious legislation making it’s way though the US Congress; the Protect IP act and the Stop Online Piracy Act (SOPA).
I’d elaborate more, but I think the Electronic Frontier Foundation has done a much better job of it than I could.
The way I see it, the easy piracy genie is out of the bottle. Much like nuclear weapons, there’s virtually no way to put that genie back in the bottle. Draconian legislation won’t stop piracy, it almost certainly won’t even slow it down. What it will do, however, is drive it increasingly underground
However, in the process of trying to do the impossible, these laws will almost certainly take down countless sites that aren’t doing anything illegal at all, quite probably to the determent of many individuals and small businesses struggling to survive as it is.
As an author and photographer, especially now in the digital age, I have to rely on copyright laws to protect my work. However, at the same time I recognize the need for those protections to be reasonable or they risk harming those of us that aren’t multi-billion dollar corporations, and who can’t afford to spends millions on attorneys, more than anyone else.
From where I sit, the SOPA/ProtectIP act certainly aren’t reasonable, especially in the light of the potential to have both my income frozen and my site shutdown by someone acting maliciously with out money or ability to fight that in court. Don’t think it could happen? The DMCA is already been abused that way to temporarily censor non-infringing content, and the DMCA has a extra-judicial counter-notice mechanism that the ProtectIP/SOPA lack.
When I first got my iPhone I was terribly disappointed by the performance of the camera that had been talked up by so many well respected photographers. That said, my iPhone is still an indispensable tool for me as a photographer, and fortunately there are apps that address much of the shortcomings of the native phone.
So with out further adieu, these are (in no particular order) the 5 photography related apps I most frequently use on my iPhone.
Camera+
 There’s something to be said about the camera you always have with you, namely the one in your phone. For years they’ve sucked—and in my personal opinion they still do—but starting with the iPhone 4 they’ve reached a point where they’re good enough for many. The only problem is when the built in camera app has a brain dead exposure curve that doesn’t dole out enough shutter speed to stop camera shake.
Enter Camera+, while it’s something of an all-in-one camera app, including the ability to apply post processing filters, the most important to me function is simply the ability to turn on “stabilization” and keep the images sharp. After that, the rest of it’s features are just gravy.
Camera+ in the iTunes Store
The Photographers Ephemeris (TPE)
 Knowing where the sun will be, and more importantly when it will be there is close to being vital for for anybody who shoot’s landscapes, and pretty darn handy for everybody else. TPE, originally a desktop app (and still available in that form), the iPhone app packs all the useful information into a mobile package.
This includes information like:
- Twilight times,
- Sunrise and Sunset times, including their azimuth
- Moon phase
Needless to say TPE is one of the first things I check if I’m considering a sunrise or sunset shoot.
The Photographers Ephemeris in the iTunes Store
LongTime Exposure Calculator
 In many ways photography is about finding a new way to show the same thing we see every day. One of these ways is though long exposures. By capturing light over seconds or even minutes, we can transform a normal scene into something that’s considerably different.
One of the hardest parts of these long exposures is metering and calculating the actual exposure. Most cameras can’t meter for a scene that requires a shutter speed slower than 30s. However when there’s a will there’s a way. LongTime Exposure Calculator will calculate exposures for extremely long exposures done with high strength ND filters, simply by entering the metered shutter speed and the amount of ND that’s being used.
A couple of quick scrolls and you’re 8s base exposure is 2 hours and 8 minutes with 10 stops of neutral density in front of the lens.
LongTime Exposure Calculator in the iTunes Store
gps4cam
 Geotagging is becoming an increasingly popular, if not a requirement. However, even pro level cameras still don’t have built in GPS capabilities, often requiring expensive addons. The second alternative is to carry a stand alone GPS—actually this is your only option if you’re a Canon shooter who doesn’t have the EOS 1Dx—that keeps a log of where it’s been. Then using software to sync the camera time and GPS time insert the location data into the images.
GPS4CAM gives iPhone users a 3rd option, use their phone’s location system to generate your location log. GPS4CAM will perform the same trip logging and export to a .gpx file that many stand alone GPSes will, but it does it with a piece of hardware you’ve already got in your pocket. Moreover, if total location accuracy isn’t critical and power usage is, gps4cam can use GSM tower data to generate location data.
GPS4Cam in the iTunes Store
Strobox
 In photography, lighting is key, and if you do a lot of shoots with models or products, being able to keep a record of your setups is definitely handy. Traditionally you might have done this with pen and paper, but not any more.
Enter Storbox, this handy program allows you to build and save top down diagrams of your setups. Moreover, you can export your setups as PNG files making it easy to share them without anyone without them having to have some specific software to view it.
Strobox in the iTunes Store
I’ve been keeping my eye on the compact market for some time. While I’m not about to give up my SLRs, I have been on the look out for something smaller to use when I don’t really need or want to carry around all the major gear—like that will ever happen.
In the last few years the “serious” compact market has been moving increasingly towards compact interchangeable lens cameras, i.e. Sony’s NEX and Olympus’ digital PEN line. I’ve never been a huge fan of that format largely because it eschews an optical viewfinder for compactness, and compactness for interchangeable lenses. Never mind the platforms are awash in confused design decisions, trying to reach both the P&S user and the serious photographer.
Don’t get me wrong the compact interchangeable lens cameras can be fine cameras for many people, but they compromise in all the wrong ways for what I want in a smaller counterpart to my SLR.
Read the rest of the story »
I did a cursory Google for this, but otherwise haven’t fully investigated it. Instead I’m posting this half to remind to me to look into this deeper when I get a chance. In any event, here’s what I’m seeing…
In Lightroom 3.6 I have a Hard drive Publish Service setup to push out images to be synced to my iPad (though that last bit isn’t really important). File naming (renaming) is disabled so files should be named exactly the same as they are in the library. Regardless of what the format is set to under File Settings, the file names are always given the extension “.jpg”. So I’ll end up with a folder of TIFFs, PSDs, and RAWs that all are all named *.jpg in published folder.
I don’t usually mess with the output settings for a Publish Service after the service has been setup, so I don’t know if this is new, or has been an issue for some time.
Is anybody else seeing this?
Forgot to note, this is 64-bit Lightroom on 64-bit Win 7 Pro.
