Focus Stacking in Photoshop and Lightroom
Photoshop since CS4 has had focus stacking built in?
Who knew?
Apparently, not me, that’s for sure.
That’s not to say that I didn’t know about focus stacking. I’ve played with the product Helicon Focus, and while I didn’t ultimately find it worth the money based on my needs, it does have some nifty features. Nevertheless, that’s not what this is about…
Why Choose focus stacking over stopping down?
Three reasons:
- More depth of field than you can get even when stopped down as far as the lens will go.
- More control over bokeh than you can get by stopping down.
- More depth of field without giving up optimal sharpness.
The first case is the typical case presented for using focus stacking. The you’re stopped down to f/22 but you still don’t have enough depth of field for the shot. Typically, this is combined with macro photography, where depth of field, even at tiny apertures, is incredibly shallow.
The real interesting case, for me, is the second one. This is the case the partially replaces the need for a tilt shift lens, but lets you keep smooth out of focus backgrounds where you want them.
While most people think of depth of field as how much will be in focus, you can also think of it as controlling how fast something will become out of focus as the distance between it and the point of focus increases, and simultaneously controlling how out of focus something will be.
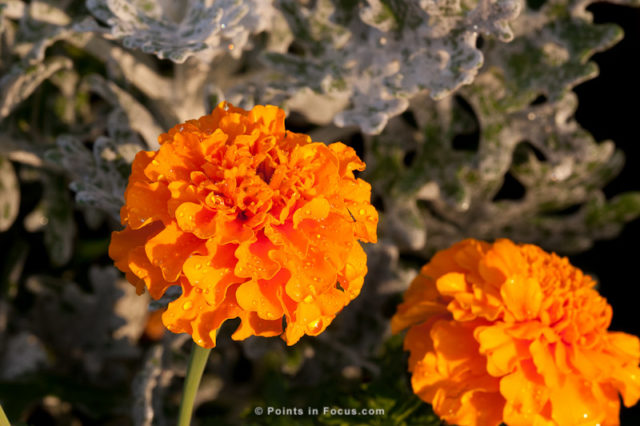
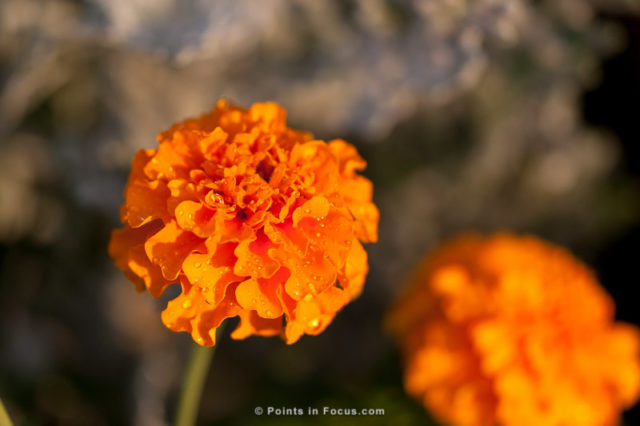
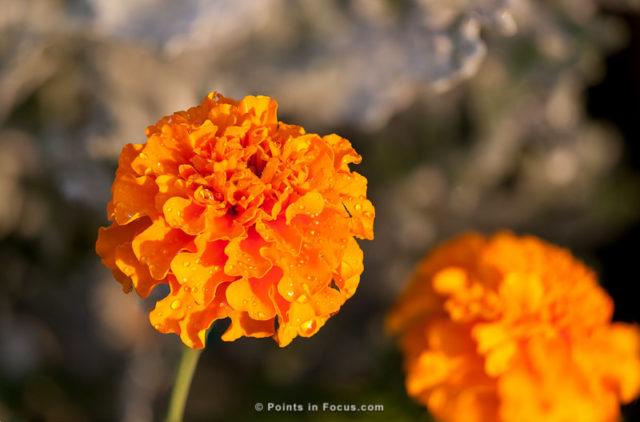
I think the photos below demonstrate this quite nicely. The objective, as far as I’m concerned, is to get a completely in focus flower on as clean of a background as possible.
Shooting at f/16 yields enough depth of field to get the flower completely in focus, but the background becomes extremely busy and distracting.
Conversely, shooting at f/2.8 the background has been cleaned up, but there isn’t enough depth of field to get the whole flower in focus.
Combining multiple images shot at f/2.8 with slightly shifted focus points, however, has the effect of increasing the depth of field on the subject while simultaneously keeping the bokeh quality of a fast aperture shot.
Problems with Focus Stacking
Like everything in photography, focus stacking is a tool that can help in some situations and may not work at all in others. It’s simply not the end-all be-all solution to depth of field problems.
Much like stitched panoramas, the stacked images are brief snaps in time taken over a much longer time than even a single stopped down exposure. As a result, moving subjects can be repeated, broken, or the whole process may not be possible. Ultimately, this means that like stitched panoramas, focus stacking is inherently limited by the subject.
Additionally focus stacking costs some resolution. This is due to the need to align and correct images slightly to account for the shifts in position. In fact, these shifts are completely unavoidable; as shifting, the focus will slightly alter the subject’s magnificent. How much resolution is lost depends on the image, the lens used, and whether the background is conducive to repair or extension in post processing.
For example, the images in this article were shot with a Sigma 150mm f/2.8 macro lens on a Canon EOS-1D Mark 3. After alignment and cropping, the 10.1 MP source images ended up producing a 8.9 MP file.
The final consideration is that if you’re doing this in the field, there’s no way to automate the image collection with current SLRs.
The 30s Tutorial for Lightroom and Photoshop Users
After importing your images into Lightroom, select the images that you want to stack, right click one of them, and select “Open as Layers in Photoshop…”
Once the images have been loaded into Photoshop there are 2 steps. First select all the layers and click Edit -> “Auto-Align Layers…” when the Auto-Align Layers dialog box comes up you make sure that Geometric Distortion is checked. Click OK and let PS do its thing.
After PS has aligned the layers, go to the Edit menu and pick “Auto-Blend Layers…” This will bring up the layer blend dialog, which has all of 3 options, create a panorama, stack images, and a check box for seamless tones and colors. Since this is a stack, we want Stack images. Additionally, it’s probably a good idea to keep the “Seamless Tones and Colors” option checked, as that will correct any minor issues in color variations between the stacked images. Again, click OK, and let Photoshop do its thing.


Comments
There are no comments on this article yet. Why don't you start the discussion?